

Generating an App
Describe your app idea in plain English and generate a complete, full-stack Laravel project with AI, including auth, database, and a live URL.
The Chat screen is where every StackMivo project begins. Describe what you want to build in plain English, and the AI generates a complete, running Laravel application.
Writing a good prompt
Type your app description in the text box. A good prompt includes the main features, key screens, and any specific requirements.
Prompt limits:
- Minimum 10 characters, at least 3 meaningful words
- Maximum 1,000 characters for initial generation
- Be descriptive: more detail produces better results
Examples of effective prompts:
Build a task management app with user authentication, a kanban board,
task assignments to team members, due dates, and email notifications.
Create a simple blog with an admin panel to manage posts and categories.
Include an RSS feed and a public-facing homepage with pagination.Build an invoice generator where users manage clients, add line items with
quantity and unit price, and can export invoices as PDF.Avoid very short or vague prompts like "make a website" or "build an app". The validator will reject prompts that don't have enough detail to generate meaningful code.
Builder mode
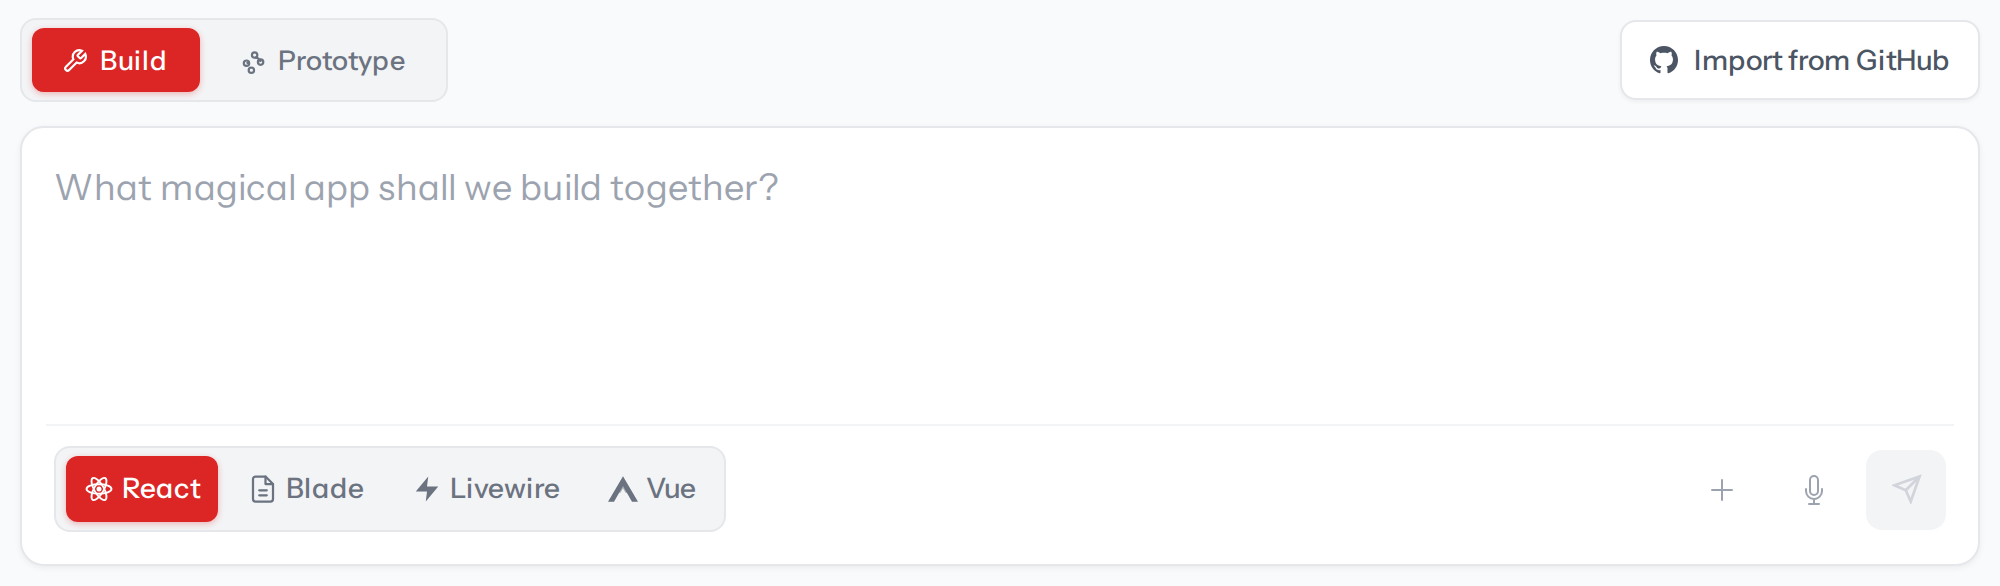
Before submitting, choose a generation mode with the Build / Prototype toggle above the prompt box:
| Mode | What it does |
|---|---|
| Build | A full-stack Laravel app with a database, models, and dynamic functionality |
| Prototype | A static UI design — perfect for prototyping layouts, with no backend logic |
Use Prototype mode when you want to mock up screens quickly; use Build when you want a working application. Build mode requires a Build plan. On the Free and Prototype tiers the selector defaults to Prototype. See Build & Prototype Modes for a full comparison.
In Build mode, a new project starts with a build plan that you approve before anything is provisioned. See Reviewing the Build Plan.
Choosing a stack
When the stack selector is available, you can pick which frontend stack your Laravel app is generated with:
| Stack | What you get |
|---|---|
| React | React components via Inertia.js (default) |
| Blade | Server-rendered Blade templates |
| Livewire | Livewire components for reactive server-driven UI |
| Vue | Vue components via Inertia.js |
If you don't choose, projects are generated with React + Inertia. The selector may be hidden depending on your workspace configuration; in that case all projects use the platform default, which is React unless your administrator has changed it.
Pick the stack before generating. It applies to the whole project, so choose the one you're most comfortable maintaining.
Attaching files
You can attach reference files to your prompt to give the AI extra context. Click the + button next to the input and choose Attach file. Three kinds are handled differently:
| Kind | Formats | How it's used |
|---|---|---|
| Images | PNG, JPG, GIF, WebP | Read by the AI as visual input (attach a mockup or screenshot) and saved into your project's public assets |
| Documents | Read by the AI as a document | |
| Text / code | TXT, CSV, HTML, CSS | The file's contents are injected into your prompt as text |
Limits:
- Up to 5 files per message
- 10 MB per file
- Large text files are truncated to stay within the prompt budget
Attachments are transient: they're kept only for the duration of the generation run and then deleted. Audio and video files aren't supported.
Attachments and Figma import require a Build plan. On the Free and Prototype tiers, choosing Attach file or Import from Figma opens the upgrade dialog. See Free & Prototype tiers.
Voice input
Click the microphone icon to dictate your prompt instead of typing.
- Speak naturally, and the transcription updates as you talk
- Click the microphone again to stop recording
- The text is added to your existing prompt (up to the 1,000 character limit)
Voice input requires microphone permission in your browser. It may not be supported in all browsers (e.g. Brave with shields up).
Sample prompts
Five pre-built example prompts appear below the input box: Food Ordering, E-commerce Store, Hotel Booking, Task Manager, and Learning Platform. Click any sample and the text auto-types into the input field. You can then edit it before submitting.
Starting from a template
Below the sample prompts, the Start from a template gallery lists complete, working applications you can copy into a new project without writing a prompt or spending credits. Click a card to preview its live demo, then Use this template. See Ready Templates.
Container creation progress
After you submit (and, in Build mode, approve the build plan), StackMivo provisions a container and generates your app. A progress bar tracks four stages:
- Setup: initializing the project environment
- Build: installing dependencies and configuring Laravel
- Configure: applying settings and environment variables
- Launch: starting services and running the AI generation
The full process typically takes 2–5 minutes. Once complete, you're automatically redirected to the IDE where your app is live and ready to explore.
Importing a GitHub repository
Instead of generating from scratch, you can import an existing Laravel project from GitHub.
GitHub import requires a Build plan. It is not available on the Free or Prototype tiers. See Free & Prototype tiers.
Requirements for import:
- Laravel 12+
- PHP 8.2+
- Node.js 20+ (if your project has a
package.json)
How to import:
- Click Import from GitHub below the prompt field
- Paste your GitHub repository URL
- Optionally add a Personal Access Token for private repos (used only for cloning, never stored)
- Click Validate, and StackMivo checks the detected versions
- If validation passes, click Import
Troubleshooting
| Error | Cause | Fix |
|---|---|---|
| "Please provide more details" | Prompt too short | Add more description |
| "Please describe what you want to build" | Too few meaningful words | Write at least 3 words |
| "Not enough credits" | Credit balance is zero | Purchase more credits |
| "You have reached your project limit" | Entry-tier project limit reached (deleted projects count too) | Upgrade to a Build plan |
| "Your team is suspended" | Member limit exceeded | Fix in Team Settings |
| Container times out (30 min) | Infrastructure issue | Try again or contact support |
Features
Everything you need to generate Laravel apps from a prompt, edit code in the browser IDE, manage your projects, and collaborate with your team.
Build & Prototype Modes
Choose how StackMivo generates your app (a full-stack Build or a static Prototype) and pick the tech stack it targets, from Blade to React, Vue, or Livewire.